Learn how to get AI editing assistance in your wiki.
An AI Editing Assistant is a tool designed to support users in creating, editing, and enhancing content more efficiently. Leveraging artificial intelligence, it can extend or shorten text, summarize content, improve writing quality, fix grammar and spelling errors, and simplify language. This intelligent assistant helps users tailor content to specific needs while ensuring clarity and accuracy, making it easier to produce polished and professional wiki pages efficiently.
A MediaWiki AI editing assistant is available on all wikis using ProWiki. To install it on your own wiki, follow the steps below.
Installation
The AI Editing Assistant extension depends on the Visual Editor Plus extension. Both extensions are available on
GitHub. Clone both repositories into your wiki's extensions directory:
git clone https://gerrit.wikimedia.org/r/mediawiki/extensions/VisualEditorPlus.git
git clone https://gerrit.wikimedia.org/r/mediawiki/extensions/AIEditingAssistant.git
Enable both extensions in your LocalSettings.php file:
wfLoadExtension( 'VisualEditorPlus' );
wfLoadExtension( 'AIEditingAssistant' );
Configuration
The AI Editing Assistant can use language models from different providers. The following models are supported:
- OpenAI GPT 3.5 Turbo
- LLama 3 (via Ollama)
OpenAI Configuration
To use the OpenAI model, add the following to your LocalSettings.php file:
$wgAIEditingAssistantActiveProvider = 'open-ai';
$wgAIEditingAssistantActiveProviderConnection = 'secret';
Replace secret with the secret key provided by OpenAI.
Generating an OpenAI secret key
Go to the OpenAI API Keys page.
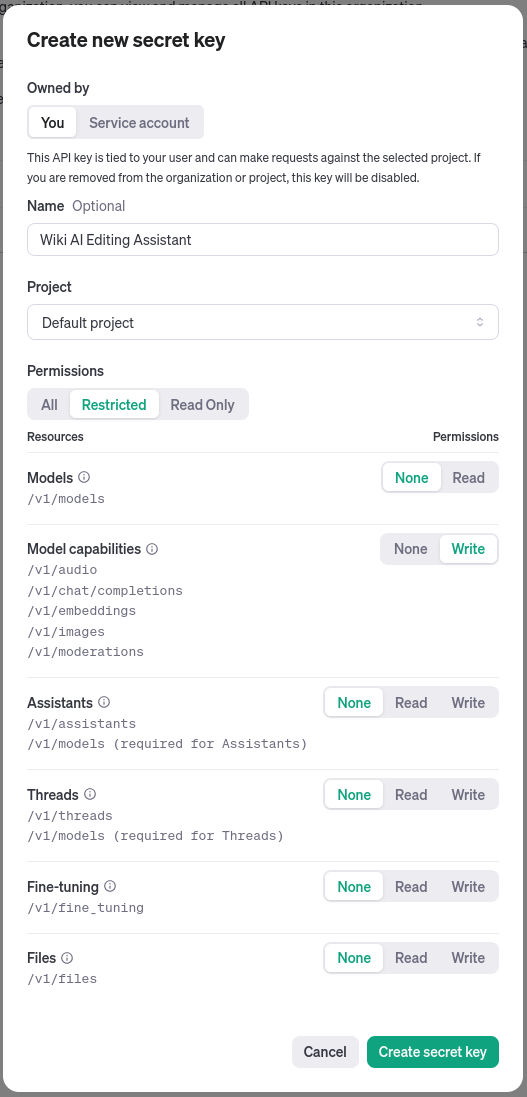
Click on "Create new secret key". On the following dialog, provide an optional key Name, select a Project, and switch Permissions to Restricted. Only the "Model capabilities" permission is required:
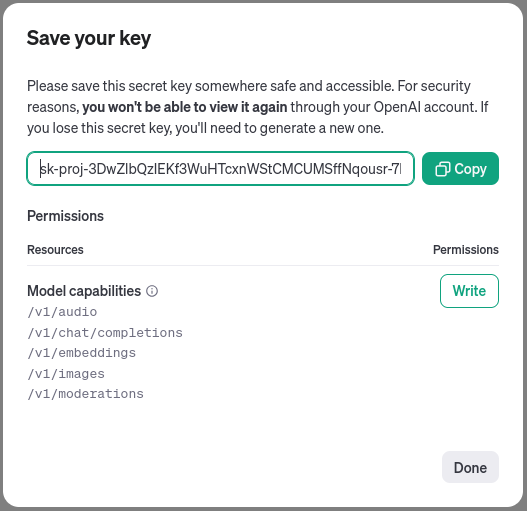
Click "Create secret key" and copy the resulting secret key in the configuration in LocalSettings.php:
Ollama Configuration
To use Llama 3 (via Ollama), add the following to your LocalSettings.php file:
$wgAIEditingAssistantActiveProvider = 'ollama';
$wgAIEditingAssistantActiveProviderConnection = 'http://localhost:11434';
If your Ollama server is not running locally, adjust the URL accordingly.
Usage
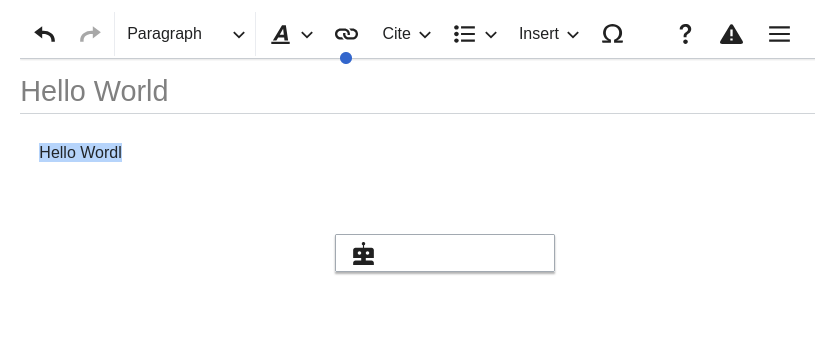
Once the extension is installed and configured, you can use the AI Editing Assistant in the Visual Editor. When editing content, select the text you want to improve. Click the button in the popup that appears:
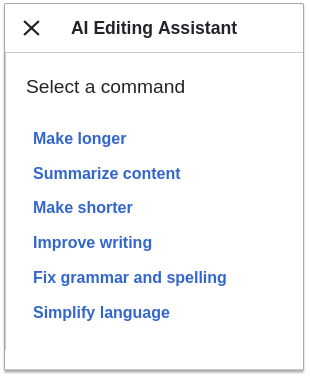
A new popup containing a list of available commands will appear. Select the command you want to run:
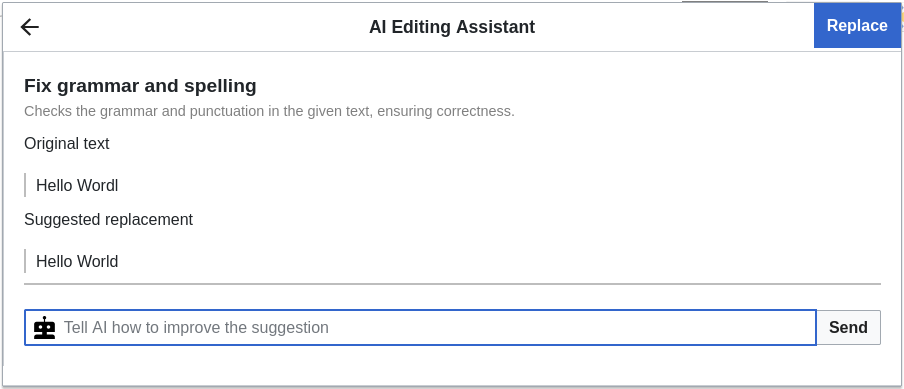
The AI Editing Assistant will then provide suggestions to improve the selected text:
Get your AI Editing Assistant and other editing tools on ProWiki.