MediaWiki supports multiple themes. MediaWiki themes are used to change the look and feel of the wiki.
MediaWiki themes are most often called MediaWiki skins. Sometimes they are also referred to as MediaWiki styles or MediaWiki layouts. For clarity, we refer to them as MediaWiki themes in this article.
Best MediaWiki Themes in 2025
In the world of MediaWiki themes, there is no one-size-fits-all solution. Depending on the needs of your wiki, you may find that one theme works better than another. However, there are a few themes that stand out as being particularly well-suited for the most common use cases.
| Responsive & Mobile Friendly |
Highlights | Bundled with MediaWiki | Available in ProWiki | |
|---|---|---|---|---|
| Timeless | Default ProWiki theme Great out of the box |
|||
| Chameleon | Highly customizable Uses Twitter Bootstrap |
|||
| Medik | Uses Twitter Bootstrap Customizable via PHP |
|||
| Vector | Default MediaWiki theme The Wikipedia theme |
For a full comparison, see our blog article Top MediaWiki Themes.
Changing Your MediaWiki Theme
To change the theme just for yourself, go to your user preferences.
You can also change the default theme for all users. And you can prevent people from choosing another theme, which is often desired when you branded your wiki, or made other important style changes.
On ProWiki
Any administrator can change the wiki theme via the ProWiki admin panel.
Theme selection is done in the Theme section accessible via the Appearance menu item.

By default users can only use the theme selected via the admin panel, ensuring a consistent user experience.
On basic MediaWiki
You will need to edit LocalSettings.php. This requires access to the server and some technical know-how.
To change the theme to Timeless, add a line with wfLoadSkin
and update the line with $wgDefaultSkin. The result should
look like this:
wfLoadSkin( 'Timeless' );
$wgDefaultSkin = 'timeless';
Note the different capitalization. The wfLoadSkin line
takes the same capitalization as the theme directory inside of the skins/
directory. In other words, you pass Timeless to
wfLoadSkin because it is installed in the
skins/Timeless/ directory. The value in the
$wgDefaultSkin line is typically entirely lowercase.
By default, all users can choose any of the installed themes via their user preferences. To prevent this, disable theme choice with
$wgHiddenPrefs[] = 'skin';Installing New MediaWiki Themes
To add new themes to your wiki, you need access to the wiki server and some technical know-how. Alternatively, you can use our theme installation services.
Step 1: Download MediaWiki Theme
Start by downloading the theme files. They need to be placed in the skins/
directory of your wiki. The download method and location depends on the theme. Check the
documentation of the theme on MediaWiki.org.
Many themes can be downloaded via git as follows:
git clone https://gerrit.wikimedia.org/r/mediawiki/skins/[name of theme]
Step 2: Enable MediaWiki Theme
Once you verified that the new theme has been placed in skins/, it is time to
enable the theme. See Changing your MediaWiki Theme
for detailed instructions.
Styling Your Wiki by Customizing a Theme
There are multiple ways to style your MediaWiki:
- Create a new MediaWiki Theme
- Configure a Customizable Theme
- Add In-wiki CSS and JavaScript
- Use the Bootstrap Extension
Some of these approaches can be combined. For example, you can use a customizable theme and the Bootstrap extension.
Create a new MediaWiki Theme
Creating a new theme gives you full control over the look and feel of your wiki. This is the most advanced option. It requires knowledge of PHP, CSS, and JavaScript, and access to the server.
We recommend commissioning a professional MediaWiki theme developer or exploring the other MediaWiki styling approaches first.
Configure a Customizable Theme
Several themes are highly customizable. This allows you to change the theme without coding. You can change colors, fonts, and other style elements via their settings.
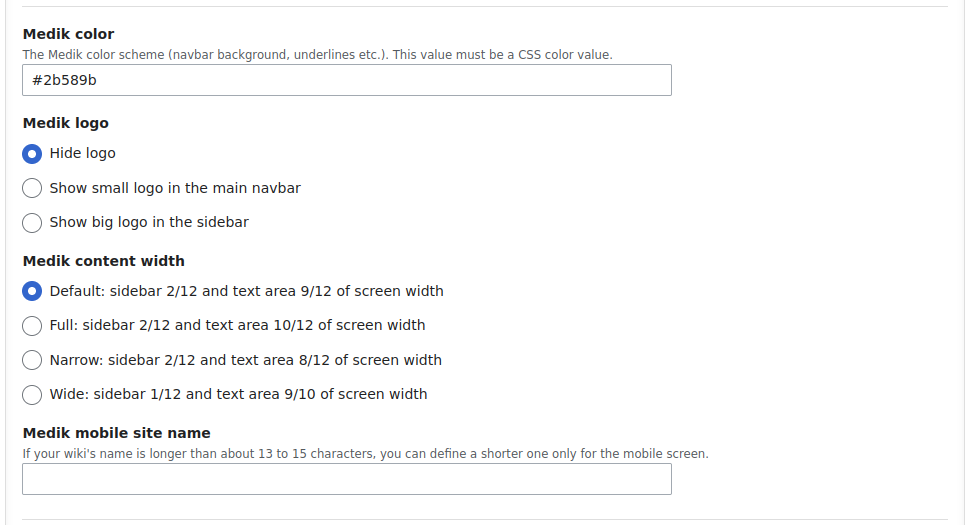
One example is the Medik skin. You can customize Medik using PHP variables in LocalSettings.php.
Another example is the Chameleon skin. You can customize Chameleon via XML. There are several templates available, and you can create your own from scratch. Chameleon's XML configuration is very powerful as it gives you full control over the layout. On the flip side, it is more complex than Medik's PHP configuration.
If you are using ProWiki MediaWiki hosting, then you can customize your theme via the admin panel.

Add In-wiki CSS and JavaScript
You can add custom CSS and JavaScript to your wiki by placing it in specific wiki pages.
Editing these wiki pages requires the interface-admin right, which is not
available to standard users.
To add custom CSS, edit the MediaWiki:Common.css page. To add custom JavaScript,
edit the MediaWiki:Common.js page. This CSS and JavaScript will be loaded on
every page of your wiki.
If you wish to add CSS or JS that is only loaded for specific themes, put it on the
MediaWiki:[theme name].css or MediaWiki:[theme name].js page.
For example, to add CSS that is only loaded for the Medik theme, edit the
MediaWiki:Medik.css page.
Use the Bootstrap Extension
The Bootstrap extension gives you access to the Bootstrap CSS and JavaScript framework. This allows you to use Bootstrap classes and components in your wiki pages, enhancing the layout and responsiveness of your wiki.
The Bootstrap extension works well together with the Medik and Chameleon themes. It is also available on all ProWiki hosting plans.
Learn how to enhance your MediaWiki with Bootstrap.